Quickstart Guide: UiPath LlamaIndex Agents
Introduction
This guide provides step-by-step instructions for setting up, creating, publishing, and running your first UiPath-LlamaIndex Agent.
Prerequisites
Before proceeding, ensure you have the following installed:
- Python 3.11 or higher
piporuvpackage manager- A UiPath Automation Cloud account with appropriate permissions
- An OpenAI API key
Info
OpenAI - Generate an OpenAI API key here.
Creating a New Project
We recommend using uv for package management. To create a new project:
Creating virtual environment at: .venv
Activate with: source .venv/bin/activate
# Activate the virtual environment# For Windows PowerShell/ Windows CMD: .venv\Scripts\activate# For Windows Bash: source .venv/Scripts/activatesource .venv/bin/activate# Install the uipath packageuv add uipath-llamaindex
Create Your First UiPath Agent
Generate your first UiPath LlamaIndex agent:
✓ Created 'main.py' file.
✓ Created 'llama_index.json' file.
✓ Created 'pyproject.toml' file.
🔧 Please ensure to define OPENAI_API_KEY in your .env file.
💡 Initialize project: uipath init
💡 Run agent: uipath run agent '{"topic": "UiPath"}'
This command creates the following files:
| File Name | Description |
|---|---|
main.py |
LlamaIndex agent code. |
llama_index.json |
LlamaIndex specific configuration file. |
pyproject.toml |
Project metadata and dependencies as per PEP 518. |
Initialize Project
✓ Created '.env' file.
✓ Created 'agent.mermaid' file.
✓ Created 'entry-points.json' file.
This command creates the following files:
| File Name | Description |
|---|---|
.env |
Environment variables and secrets (this file will not be packed & published). |
uipath.json |
Input/output JSON schemas and bindings. |
agent.mermaid |
Graph visual representation. |
Set Up Environment Variables
Before running the agent, configure OPENAI_API_KEY in the .env file:
Authenticate With UiPath
🔗 If a browser window did not open, please open the following URL in your browser: [LINK]
👇 Select tenant:
0: Tenant1
1: Tenant2
Select tenant number: 0
Selected tenant: Tenant1
✓ Authentication successful.
Run The Agent Locally
Execute the agent with a sample input:
✓ Successful execution.
This command runs your agent locally and displays the report in the standard output.
Warning
Depending on the shell you are using, it may be necessary to escape the input json:
Attention
For a shell agnostic option, please refer to the next section.
(Optional) Run The Agent with a json File as Input
The run command can also take a .json file as an input. You can create a file named input.json having the following content:
Use this file as agent input:
Deploy the Agent to UiPath Automation Cloud
Follow these steps to publish and run your agent to UiPath Automation Cloud:
(Optional) Customize the Package
Update author details in pyproject.toml:
Package Your Project
Name : test
Version : 0.1.0
Description: Add your description here
Authors : Your Name
✓ Project successfully packaged.
Publish To My Workspace
✓ Package published successfully!
⠦ Getting process information ...
🔗 Process configuration link: [LINK]
💡 Use the link above to configure any environment variables
Info
Please note that a process will be auto-created only upon publishing to my-workspace package feed.
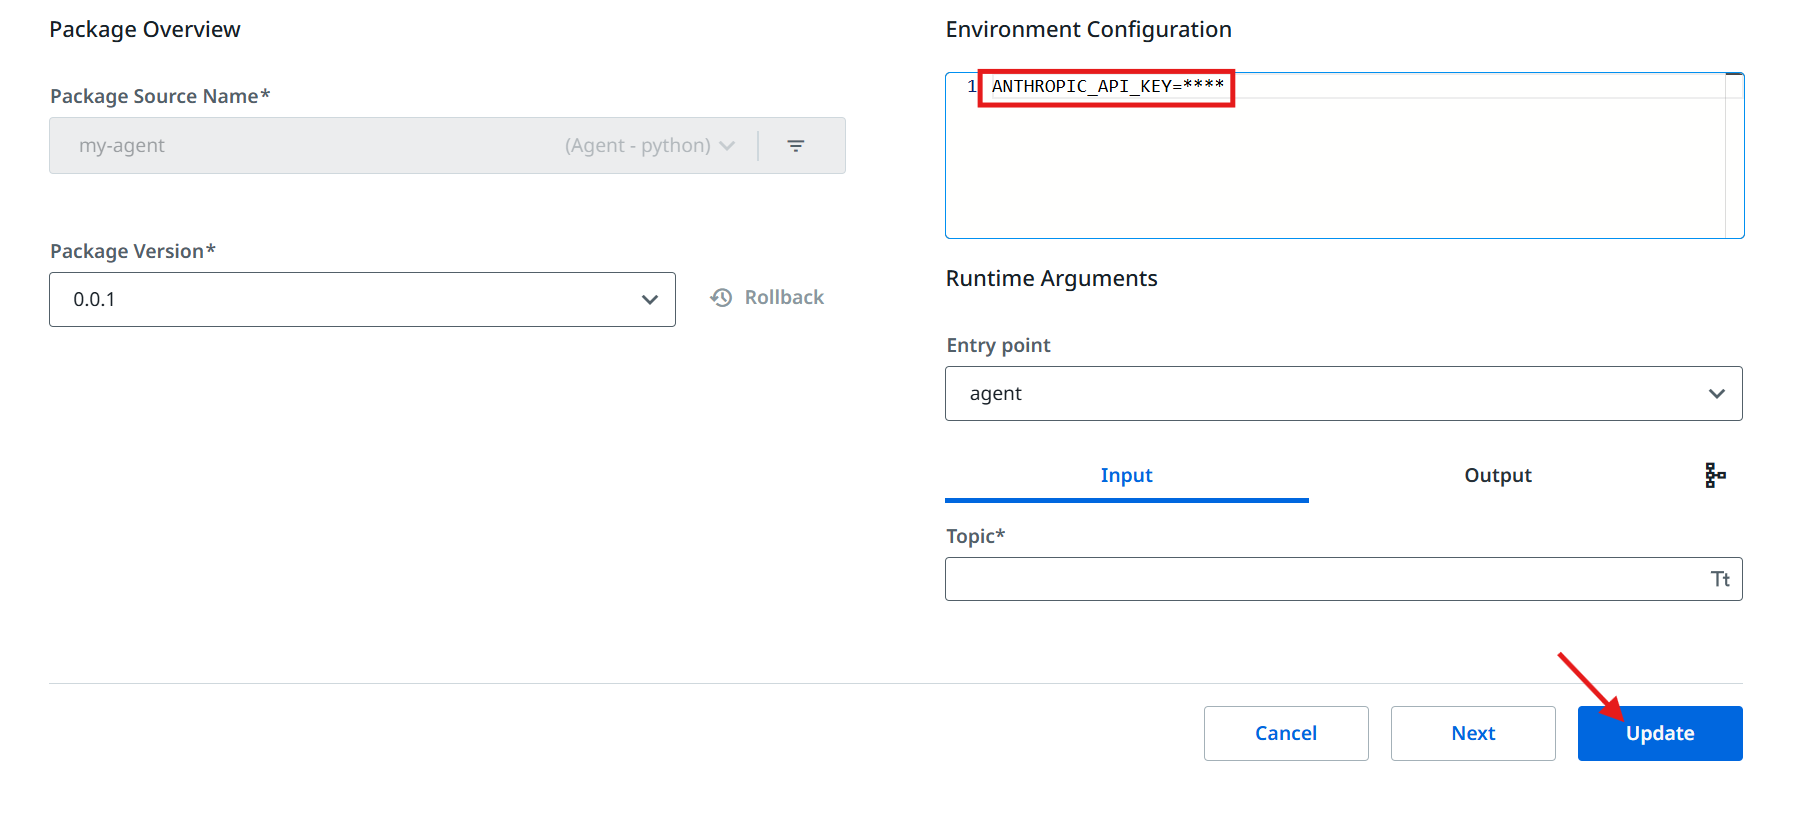
Set the environment variables using the provided link:

Invoke the Agent on UiPath Automation Cloud
⠴ Starting job ...
✨ Job started successfully!
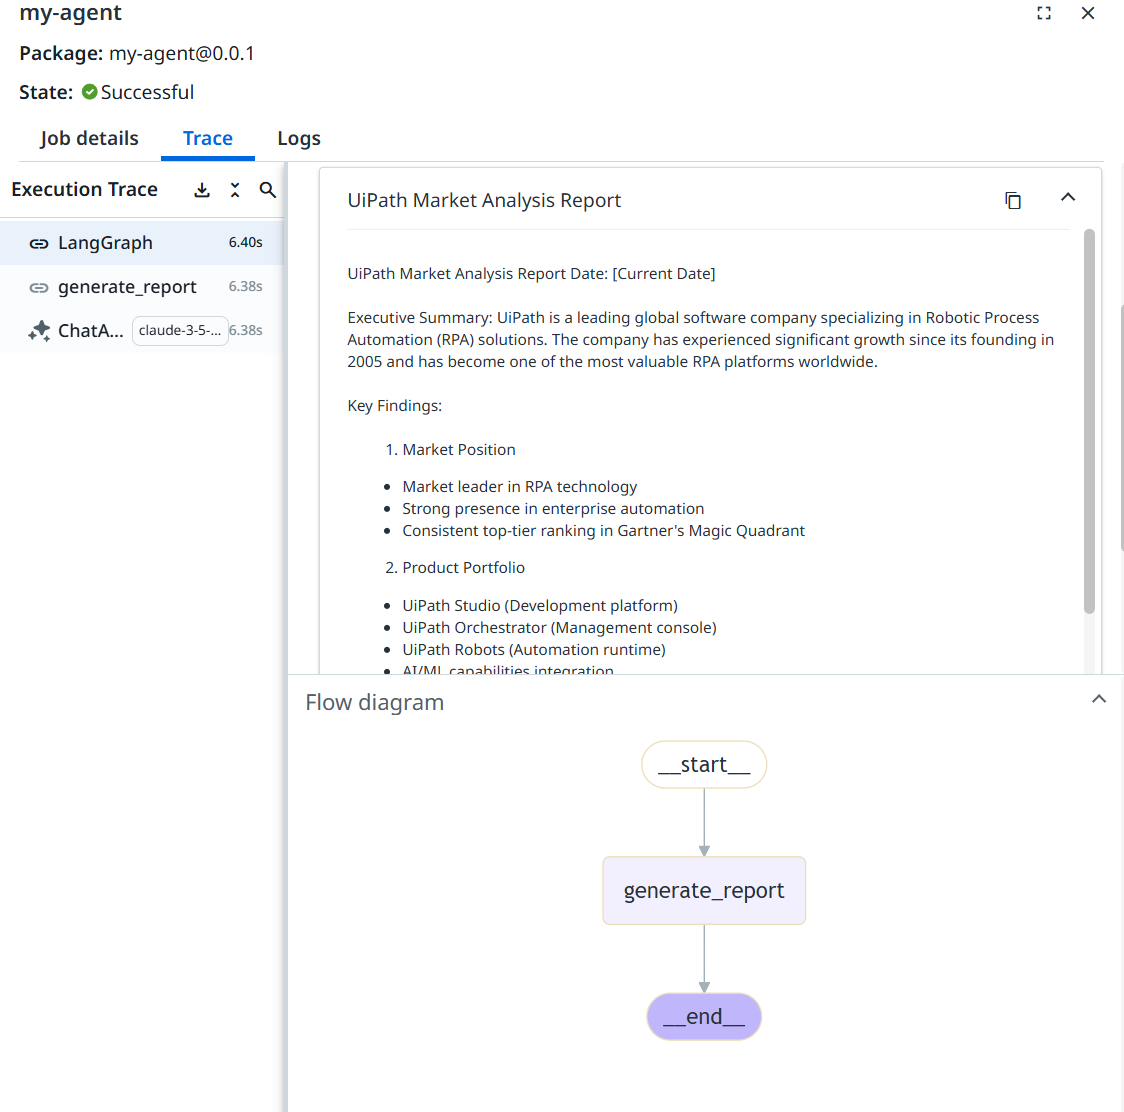
🔗 Monitor your job here: [LINK]
Use the provided link to monitor your job and view detailed traces.

(Optional) Invoke The Agent with a json File as Input
The invoke command operates similarly to the run command, allowing you to use the same .json file defined
in the (Optional) Run the agent with a .json file as input
section, as agent input:
Next Steps
Congratulations! You have successfully set up, created, published, and run a UiPath LlamaIndex Agent. 🚀
For more advanced agents and agent samples, please refer to our samples section in GitHub.